Revision Manager TMC v2
Video tutorial
BEGINNER’S GUIDE FOR WORDPRESS has created a wonderful tutorial on how to start using Revision Manager TMC from scratch.
We really wanted to make our plugin easy-to-use and straightforward.
If there is something you are not sure about, please feel comfortable with asking us directly 🙂
Choose Post Types
From the list you can choose post types supported by plugin. Use the check box to indicate which types of posts will be used on your website.
We support every WordPress post type, which works with default Posts Table.
We support Advanced Custom Fields
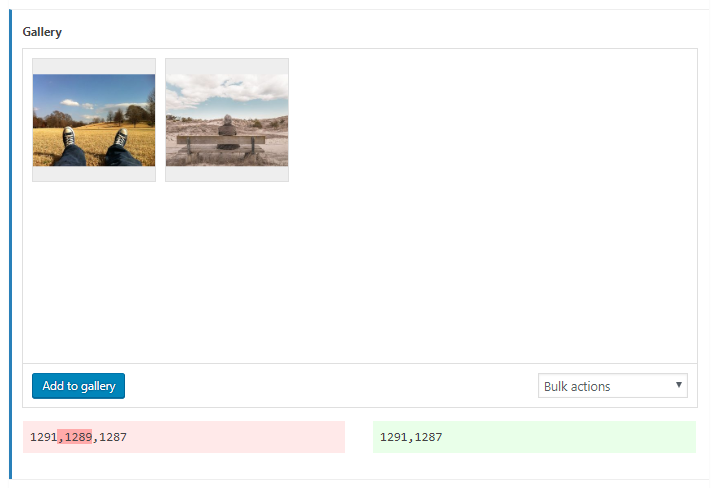
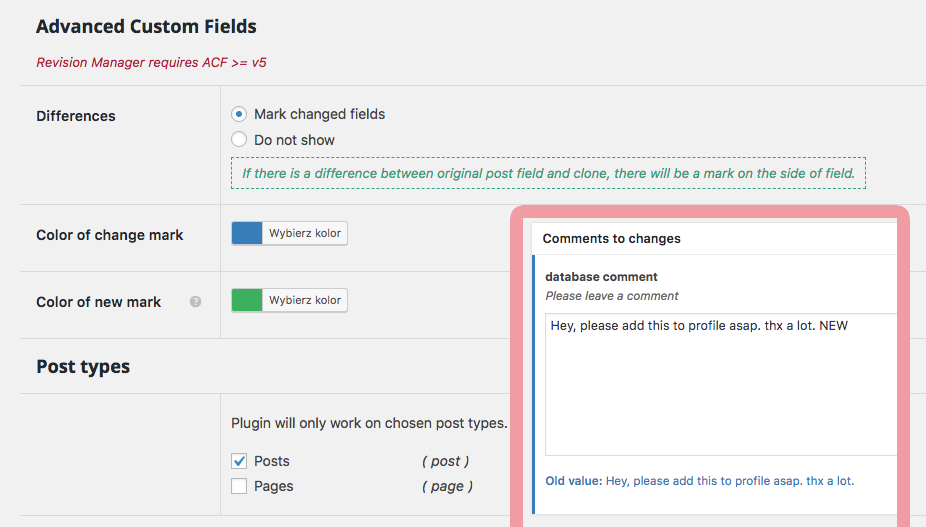
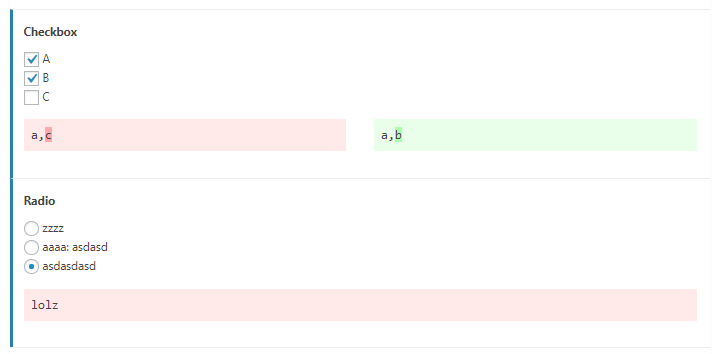
We strongly support ACF. In 2.1.0 version of our plugin we launched new feature, allows to show differences in fields changes. So if there is a difference between original post field and clone, there will be a mark on the side of field. On the right you may see backend panel with ACF option. You can easly choose change mark color or simple toggle to not show the differences. You can follow the changes in the acf fields such as gallery, checkbox, radio elements or text. See examples below.

Capabilities & Notifications
In this section you decide:
- who can create a copy of content (future revision)
- who can accept post revisions
- who will be notify about revisions
Copy creation allows to choose capability able to create a revision draft (future revision). For example, if the Author and Editor have capability edit_posts they will both be able to create a copy.
Acceptation allows to choose capability able to accept revision post.
Notification allows you to select the role that will receive notifications.
Another cool thing is that you may also choose e-mail addresses you want to exclude from notifications, by simple typing and separating with commas.
Notifications content
This section of plugin allows you to personalize the e-mail notifications. You are allowed to:
- by using WYSWIG simple and in effortless way adapt e-mail notification,
- change mail title,
- use one of predesigned cool e-mail templates or define your own html style
- use codes (such as %post_url%, %post_admin_url%) to personalize your e-mail notification content and title.
- add your logo or any other media
You may also quick test your e-mail notification content by using “Send test”.
Personalize your e-mail notification
To personalize your e-mail notification (including the title), choose codes from the list below:
- %post_url% – URL of post visualization.
- %post_title% – Title of this post.
- %post_admin_url% – URL of admin page, where you can accept changes.
- %author_name% – Author of this revision.
- %author_mail% – His/her e-mail address.
- %site_url% – Dynamic link of your website.
Revision Manager TMC v2